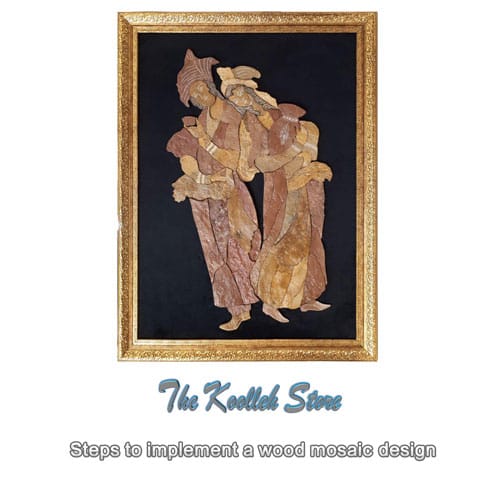
Steps to implement a wood mosaic design

In the past, mosaics on wood have had a valuable place, but in today’s world, due to the negligence of people in this profession, its value has decreased.
1. Map design: The map design is drawn by the designer and then glued to a plywood board with instant glue. The above combination is called modeling.
2. Crushing the model: The model is mounted on a 19-seam foil stick with a shadow nail, and then the combination is placed on a prefabricated board and cut into different pieces by a hair saw.
3. Installation and shredded parts: A set of shredded parts is placed on a 18 mm board, a few three-sided boards or a support board, which is covered with a piece of nylon, and installed on the board by a shading nail. .
4. Drawing the maps: Each of the chopped pieces, which includes a part of the background and the map, is removed from the backing board by placing a shadow nail and placed on the foreground, and the lines related to the maps are removed.
5. Preparation and installation of the main background: At this stage, the plywood board that is placed on the foil wood or walnut is removed and a part of the main background is visible. This piece of foil is then temporarily installed in place on the backing board according to the plan.
6. Transfer of maps on industrial wood: After the previous step, the remnants of the crushed pieces, which include a part of the main maps and the three-layer board, are separated from the foil wood that is under this set. They remove the foil wood and use the three-layer board of the map as a template. By choosing the color of the wood, they place the pattern on it and move it away, thus creating the same role with the type and color of choice, and place it on its original place, which is in the middle of the blank background, on the backboard. Give. In this way, all the crushed maps are prepared from different colors of wood, oysters and ivory and replaced with models.
7. Connecting the maps: After replacing the color maps instead of the original model, they prepare a thick and sticky liquid from my series and Hamra powder and apply it to all the grooves between the maps with their index finger. In this way, all the pieces are glued together and fixed. At this stage, the shadow nails are removed from the maps. After gluing the patterns, they remove the nylon that has already been placed under the work and on the backing board and return the glued patterns and wipe the back of them with a soft sandpaper, thus removing the adhesives that have penetrated the backing through the grooves.
8. Pressing: This step of the job is done in three parts:
A) The surface of the perseverance board is impregnated with hot glue with a spatula, and then a mosaic map is affixed to it, and two measuring nails are installed at the top and bottom to keep it fixed.
B) First they put a piece of nylon and then a double blanket on the mosaic map. This is to prevent the map from breaking under the pressure of the device.
C) Place the above compound in the press machine and adjust it and pressurize.
9. Side rotation: After being pressed, if the object has irregular sides, to remove it, first its length and width are adjusted by matching it with a smooth goniometer and then they are placed in the middle of the clamp and grate the gonialized sides.
10. Payment: Due to the different thickness of industrial wood, the surface of mosaic patterns is not the same, and in order to remove it with a sanding machine, they make a paper number 40, and this process continues until all the patterns are in the same level. It should be noted that if the sanding machine is not available, a tool called a stick can be used if the shell or ivory is not used in the mosaic.
11. High school and re-pay: After paying the job, the wood chips are scattered on the surface of the object, which is collected by the high school and polished again to polish the surface of the object by sanding the number 1. This process continues until the finger slides on the surface of the mosaic object.
12. Polyester application step: This part of the job is done in three steps:
A) Stick the object environment with paper tape in a way that 2 or 3 mm above the surface of the object.
B) Pour the prepared polyester mixture evenly on the desired plate and then spread it on the whole surface with a small comb to completely cover the background and surface of the mosaic patterns. The polyester can also be sprayed on the surface of the object by air pump for ease of operation.
C) After 24 hours, the polyester is dried on the object to make the maps appear under the polyester, the surface is made by vibrating sanding to which the sanding plate number 40 is attached, and again, for more transparency, a layer of pure polyester on the surface. It is sprayed with bubbles as it dries, using a 400-gauge sanding plate to remove them.
13. Last step of the payment: In this step, it is paid by the device to which the felt plate is attached and the work surface is polished using polishing materials. To further polish the plate, a softer felt (lambskin felt) is attached to the device and the surface is polished using a white material called a milk bridge.
14. Killer: When the mosaic object is not of high quality, Killer is used for its protection and polishing instead of polyester, which is used in five stages as follows:
A) The first important point is to choose a glossy killer and its consumption does not have a specific size and it can be used in the desired amount.
B) The concentration of this substance is high for spraying on the work and for this reason it is mixed with some instant thinner to make it thinner.
C) Pour some of the above mixture into a hollow container and place it with a pistol (Fatek) in such a way that its large tube is vertical and at least 5 cm inside the liquid and inside the smaller tube which is placed horizontally. The liquid inside the container can be sprayed evenly on the work surface. At this point, it is important to note that if the killer is not sprayed into the pistol after blowing, the concentration of the liquid must be high, in which case a little immediate thinner will be added again. An air pump can also be used to spray the killer for ease of operation.
D) After drying, they spray water droplets on the work surface with their fingers and then draw a 400-numbered sandpaper (water shell) on it, thus eliminating the small bubbles that are created.
E) Finally, another thin layer of killer is sprayed on the work surface.
15. The disadvantage of most wood panels is their curvature and curvature: This means that wood and paint or varnish are not equally capable of absorbing moisture, and after a while the surface of the board bends. On the board, which is painted or varnished, they absorb less moisture than the back, which does not have any cover, and as a result, it causes uneven expansion on both sides.
To prevent this problem, the back of the board can be covered with a material such as wax or gum or a thin layer of lacquer placed on the board, thus preventing the absorption of water.


